How To Apply
Highlight Stick

About the Stick
Designed to give you a lit-from-within glow without any glitter or sparkle. trestique's refillable Highlight Stick is perfect for on-the-go application and imparts a subtle, glowing effect that enhances your natural features. It's like a shot of espresso for your skin, giving you an instant pick-me-up with its light-reflecting luminosity.
Why We Love It
Formula Side 1:
An instant wake-up call for your skin, this highlighter imparts light-reflecting luminosity without any glitter or sparkle. The cream-gel formula glides over the skin leaving a soft, glistening effect.
Applicator Side 2:
The built-in, dome-shaped blending sponge blends for an even, glowing finish without over-absorbing the formula.
The Shades:
The basis
Before We Start

1. Find Your Shades
Let our AI recommend a shade for you using our Selfie Shade Match Quiz or select your favorite shade using our Color Guide.

2. Preparing Your Skin
Use a gentle cleanser to remove any dirt, oil, or makeup from your skin. This will help the Highlight Stick adhere better to your skin.

3. Applying Highlight Stick
Now that your skin is prepared, it's time to apply the Highlight Stick. Follow the upcoming steps for a flawless application.
Tutorial
Watch the video
The step-by-step guide

Preparing Your Skin
Before applying the Highlight Stick, it's essential to prepare your skin. This will ensure that the highlighter applies smoothly and evenly, and that it lasts longer.
1. Cleanse your skin - Use a gentle cleanser to remove any dirt, oil, or makeup from your skin. This will help the Highlight Stick and adhere better to your skin.
2. Moisturize your skin - Apply a moisturizer to hydrate your skin and create a smooth canvas for the Highlight Stick.
3. Use a primer (optional) - A primer can help smooth out your skin texture and make your foundation stick last longer. Apply a small amount of primer after moisturizing your skin and allow it to dry before applying the Highlight Stick.

Applying Highlight Stick
Now that your skin is prepped and ready, it's time to apply the highlight stick.
1. Glide the Highlight Stick directly onto your face where the light naturally hits: the brow bone, top of the cheekbones, bridge of the nose, and cupid's bow. Use a light hand and build up the intensity gradually for a look that is customized to your personal preference.
2. Flip your product to the opposite side and use the Highlighter Blending Sponge in a dabbing motion to delicately blend. The built-in, dome-shaped sponge blends for an even, glowing finish without over-absorbing the formula.
3. Now that your highlighter is blended and looking fabulous, you can complete your makeup look with your favorite products.

Tips For A Perfect Application
Here are some tips to help you get the best results from your Highlight Stick:
1. Use a light hand when applying the highlight stick for a more natural-looking glow.
2. Start with a small amount of product and build up gradually for more intensity.
3. Use the built-in blending sponge to blend out the highlighter for a seamless, glowing finish.
4. Apply the highlighter in natural light to ensure that it looks even and natural.
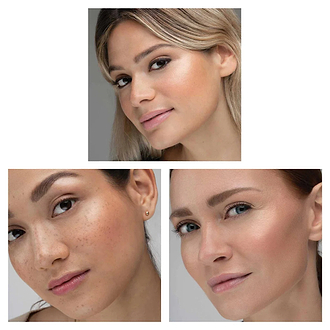
The Final Look: Skin that looks naturally dewy and radiant.


